Hollow Knight: Silksong has kept its community busy well into 2026, and the Quick Sling remains one of the most talked-about Blue Tools for players who want to squeeze extra damage out of their Red Tool loadouts. Red Tools in Silksong act as additional combat accessories—some work as long-ranged projectiles, while others can be set up as traps before a boss fight even begins. The Quick Sling, however, is not just another tool; it changes how those Red Tools behave. The long and short of it is that the Quick Sling lets a player activate two Red Tools at once, but it is locked behind a challenging Act 2 route and can be a real double-edged sword in practice.
Prerequisites: Two Movement Abilities
Players cannot simply stroll into Sinner's Road and expect to snag the Quick Sling. The first hard requirement is reaching Act 2. Beyond that, two movement abilities are non-negotiable. The double jump is found at the top of Mount Fay, and the platforming section guarding it is notoriously brutal. Many players have burned a good chunk of time on that climb, but once the double jump is unlocked, traversal and future platforming challenges become far more forgiving.
The second requirement is the wall jump, which is unlocked in Shellwood. Without it, the entrance to Sinner's Road from the top right part of Greymoor remains inaccessible. Those who have not yet picked up the wall jump should hold their horses and backtrack before attempting this route.

Step-by-Step Route to the Quick Sling 📍
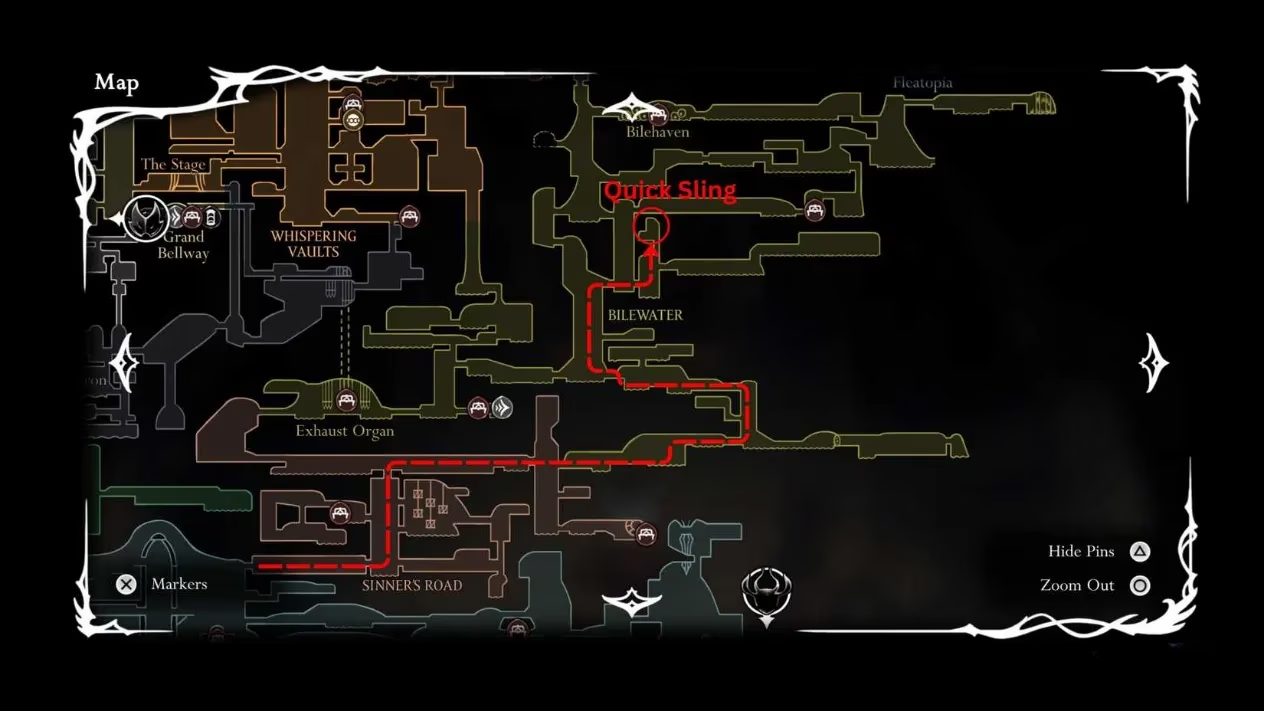
Once inside Sinner's Road, players should follow this route carefully. The area is filled with cages, spiked wheels, and narrow passages, so a methodical approach beats rushing.
-
From the entrance of Sinner's Road, players should make their way upward and head right once the first enemy is spotted.
-
Climb up the cages and down slash the spiked wheels to reach the top left section of the room, then exit through it.
-
Go up and leave through the path on the right until reaching the lever that opens the gate.
-
Enter the tower-like room and head right to find a breakable wall, which grants access to Bilewater.
-
Follow the path until it splits. The right path leads to a Needolin door with the Ruined Tool inside—an optional pickup for completionists.
-
Take the upward path and turn left at the top. In the vertical room, go up and enter the second passage on the right. The first right passage leads to Shakra and a map, so players with Rosaries should make that detour.
-
From the second passage, move further right and then up to find a breakable wall that hides the Quick Sling.
How the Quick Sling Works ⚔️
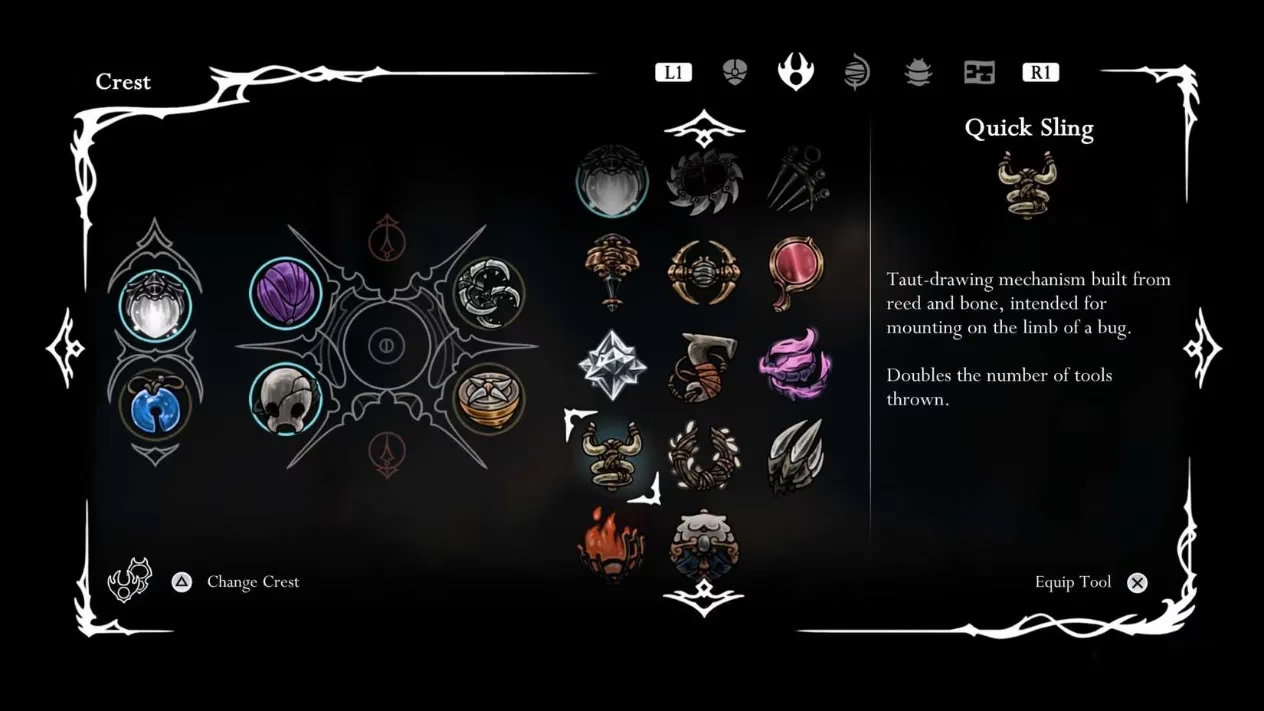
At its core, the Quick Sling is a Blue Tool that enables a player to use two Red Tools in one go. For example, instead of spawning a single Cogfly, activating the tool will now spawn two. That sounds like a no-brainer for boss fights, but there is a catch: because two tools are spawned at once, two tools are also consumed. Players who spam the Quick Sling without a plan will find their inventory drained faster than expected.
The Quick Sling shines with tools such as the Conchcutter, Cogfly, and Longpin. These projectiles or summons benefit from double deployment and can stack pressure on enemies or set up more elaborate traps before a fight. However, not every Red Tool plays nicely with the Quick Sling. The Sting Shard is a prime example—two Sting Shards launched simultaneously tend to collide with each other and scatter before the boss even gets close to the trap. That makes the pairing feel like a real double-edged sword.
Is the Quick Sling Worth It? 🛠️
Whether the Quick Sling deserves a permanent slot depends heavily on playstyle. For exploration, the answer is usually no. The Quick Sling takes up a valuable tool slot, and normal enemies rarely justify launching two tools at once. Most overworld encounters can be handled with a single well-placed tool, so the extra resource drain is hard to justify.
In Arena sections, though, the Quick Sling can be a real ace up the sleeve. When players are locked into a combat gauntlet or preparing for a tough boss, doubling the output of tools like the Cogfly or Conchcutter can create overwhelming pressure and give Hornet more breathing room. This is where the Quick Sling truly earns its keep.
On the other hand, players farming for Rosaries and Shell Shards should think twice before equipping it. Using two tools when one would suffice is a fast way to waste Shell Shards, especially during long farming sessions. The numbers simply do not add up for efficient resource gathering.
| Scenario | Verdict | Notes |
|---|---|---|
| Exploration | Not great | Uses a slot, overkill for normal enemies |
| Arena / boss setup | Strong | Doubles pressure with Cogfly, Longpin, etc. |
| Resource farming | Skip it | Burns Shell Shards faster than needed |
| Sting Shard combo | Avoid | Shards collide and scatter |
At the end of the day, the Quick Sling is a powerful but situational tool. Players who enjoy setting up elaborate traps and min-maxing Arena encounters will find plenty to love. Those who prefer a lean, resource-conscious build may want to leave it in the stash. Either way, grabbing it is absolutely worth the detour, if only to have another option when a boss fight demands a little extra firepower.
Leave a Comment
Comments